So, I'm planning on making this stand's frame from PVC piping. I have two reasons for this decision for the design I have in mind. One, PVC is a LOT lighter than plywood and wooden slabs that I've used for Stands I and II. Two, PVC piping often has premade joints of various shapes, so I'll be able to use those to make a solid, standard frame, one that does not have to be nailed together (although I may put screws through the horizontal joints, but that is screws, not nails), and one that will allow me to easily disassemble it.
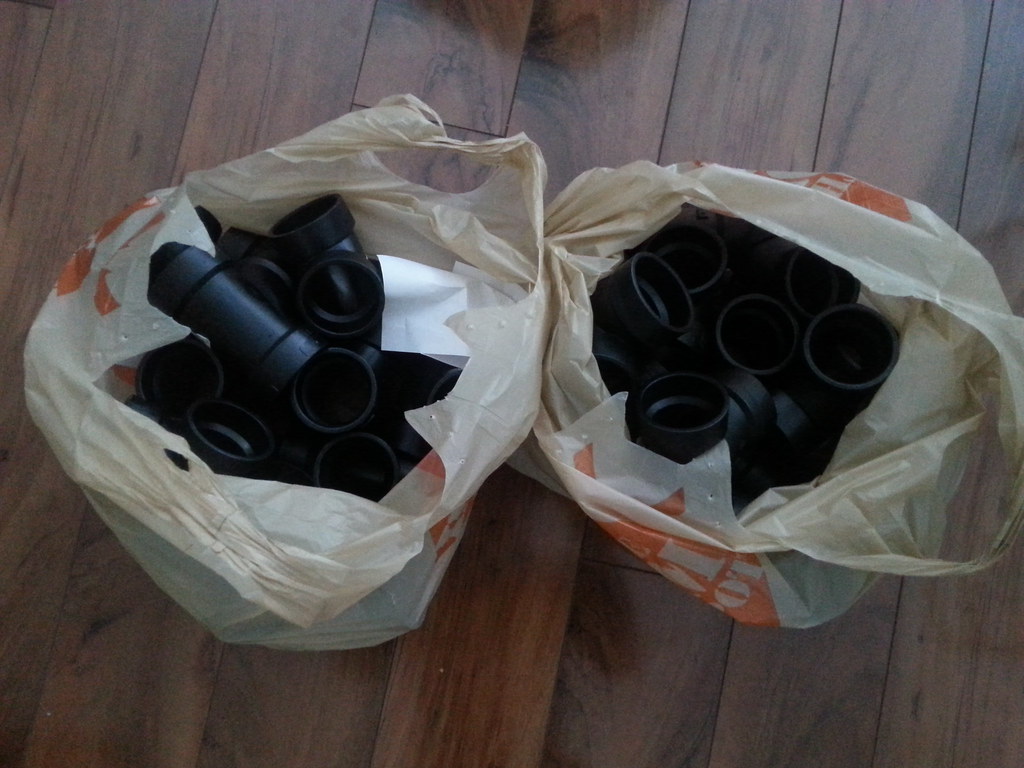
So here are the cornerstones, foundation, and general skeleton of my hypothetical stand. I went to my local Home Depot, and after looking at the sizes of the PVC pipes, I decided a 1.5" diameter pipe should be sturdy enough for the frame of the stand. So, I then went to work looking through all of the premade joints and found these, which were exactly what I wanted.
This is the most critical component for my stand. The unfortunate thing is that since these joints have all female ends, I will have to cut small sections of pipe to actually join these pieces together. The fortunate thing is that they have notches all around the female ends so I can know if I am lining the pieces up at a right angle.

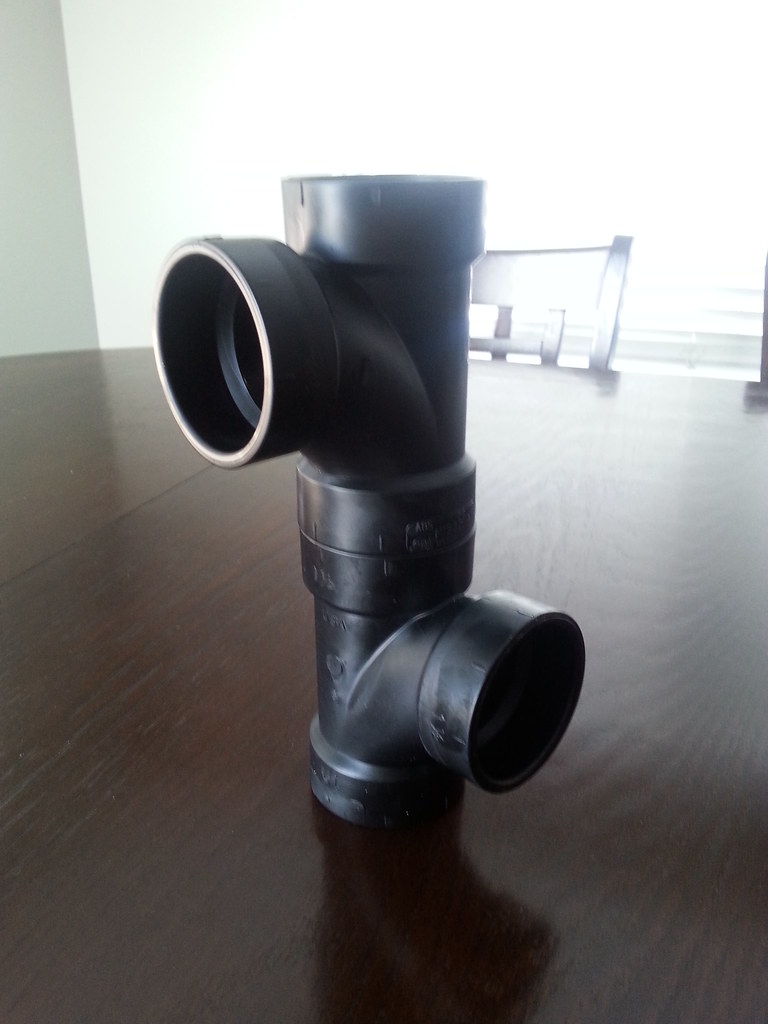
And here is a picture that hopefully shows what I am aiming for. After using that short little piece of tubing to connect these pieces at right angles, I'll then use more tubing to connect the horizontal openings you see here. This will make the base of level one. I plan on using some form of shelving which will then hold the trays that hold the egg-crate which the plants will then sit on. Next will be the tubing going up. There they will meet the exact same format of joints shown here, which will then form the roof of level one, and the base of level two. Repeating, they will then go up again and form another roof and base. For the roof of the third level, the format will be slightly modified, ending in 90* joints instead of the t-joints shown here. However, I plan on having the t-joints right after the 90* joint so there is still cross-support.
Now for some potential problems and my plans to remedy them. As I mentioned in my last post, I added a third ballast into the upper level in my closet in order to accommodate three different colours of bulbs. The benefit of that is the growing evidence that this new lighting set-up is a boon for at least some form of plant growth (four new spikes discovered since adding them, although it could still be coincidence). The downfall as that adding in a third bulb greatly increases the amount of general light put-out is increased, meaning I have to back the ballasts away from the plants. Now, if I am to incorporate the three ballast set-up into this new stand, I might end up with a very tall stand if I want to prevent light burns to my low light needing Phalaenopsis. What I am hoping will be the simple solution, something that may appear wasteful, is some form of shade cloth under the lights. This way I will still be getting the three different spectrums from the three different bulbs, while allowing me to have the bulbs quite close to the plants. Now I'm talking about some 50-75% shade cloth, because I want to have these bulbs something around a foot away from the leaves of the plants possibly closer on my seedling level, and currently I have to have the three bulbs over two feet away, quite an inefficient use of space.
Another issue will be keeping this thing sealed from the outside environment, in order to keep its warm, humid air inside, and the bright light out of my bedroom. I did have some form of this for Stand II, which was outside of my closet. However, it was still quite inefficient, and the stand lost a lot of its humidity, and practically lit my room up like the midday sun. I am once again planning on wrapping the stand in some thick, possibly black plastic (although I don't know what that'll do to the internal heat levels). I was planning on having a large sheet of plexiglass for the front, in which I would cut out little windows and have them on little hinges, but according to my dad, plexiglass is freaking expensive. So, that is something I am going to have to look into.
So to wrap this post up, I do plan on at least trying to keep track of the progress of this stand, although it may be slow because today was the last decent chance I would have had before school starts up again, but I have to work in a few hours, plus it is REALLY cold out, so I don't know where I'll be able to do any cutting of the PVC pipes. And of course, that new spike I was talking about.
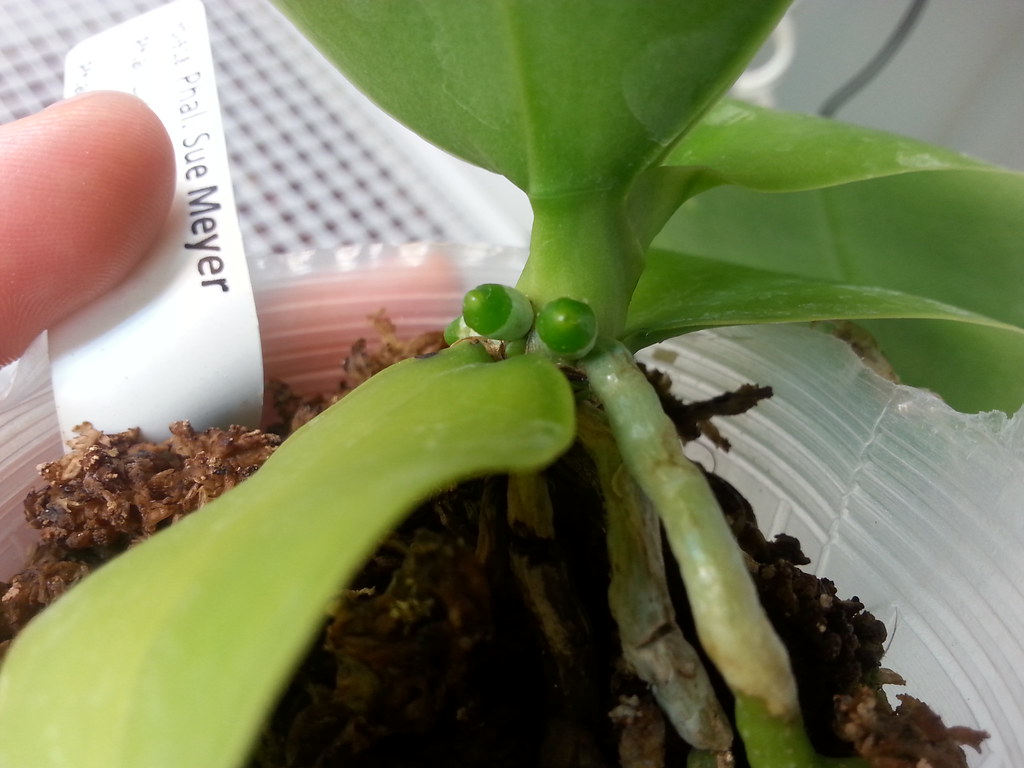
This latest spike is on my Sue Meyer, and it's little more visible, being that little nub beneath the root in the middle of this picture. In a previous post, I shared a picture sent to me by Patrick of two siblings of this cross he bloomed, so I am looking forward to seeing this bloom.
Dear heavens this was long, but I do enjoy typing, so I'm glad I had some vacation time to go gung-ho here on the blog!
What a neat idea! Good luck with your new stand. To seal the humidity and keep the lights in - have you looked at Hydroponic Grow Tents? They zip up around your stand, usually black from outside and have reflective walls inside. If you google them - you'll see all the different size they come in.
ReplyDeleteHey there!
ReplyDeleteI am Στηβ (Steve) from Athens and I blog on MyOrchid.gr (also have a small online local orchid nursery). I am launching the site in English (currently beta just a couple of posts got translated so far). I would like to keep the english version as an international community of bloggers. Here's how it was implemented in Greek http://myorchid.gr/blog/microblogs/ so long story short I am trying to invite people like you that have a passion about orchids and an eye for photography but also know how to care for them. Concept is that it will be as multilingual as possible (the site supports that each article can have as many versions in different languages as the bloggers wish to offer). I think your orchid culture journal in a closet will find an audience with our local readers and will greatly help the site to gain international readers. I am not sure how to "sell" this idea to you, I mean I am not sure if there is anything for you to gain since you already have a great blog... I can only think that sharing our passion for orchids in a community like blog is a great idea and as a collective effort would sure find a greater audience.
With your help MyOrchid could bloom! Thank you for your consideration.
Best Regards,
Στηβ
Lynne here,
ReplyDeleteAs an "Orchidoofus" I will be looking forward to the post which shows the completed Stand III?
Your materials (ie pvc pipe joints and pipes) sound perfect for what I'm seeking - racks for seed raising (not orchids, but using their shadehouse).
Thanks for all the details.